How to: Run a DOS-based Web Server (seriously)
Apache and Nginx, eat your heart out.
The following article was originally published on The Lunduke Journal back in 2020. But it’s just so darn fun it is being republished again. Everyone should run a DOS webserver. At least once.
Apache and Nginx are great Web Servers. Linux and FreeBSD are fantastic systems for running them on. But… what if… we wanted to do something a little more off the beaten path?
What if… we ran a Web Server… on DOS?
Yeah. DOS.
It's doable. Truly it is. And, while DOS may not be the high-up-time, massively scalable Web Server platform of the future… it's still a heck of a lot of fun to set up. Plus, it only takes a few minutes. At which point you can say to the world: “Hey! I ran a DOS Web Server!”
Which is a far more enjoyable thing to say than perhaps it should be.
We're going to use FreeDOS as the base operating system here. FreeDOS is a Free and Open Source, MS-DOS compatible operating system that is still (even in 2021) under active development. Never fear, it's still DOS.
Note: Some of this will also work in MS-DOS, but FreeDOS makes the process much easier.
Step 1) Install FreeDOS
Go to freedos.org and download the full .ISO for FreeDOS.
Then install FreeDOS.
If you have difficulty here, the FreeDOS team has put together step-by-step instructions (with videos, screenshots, the works). Luckily this should be a simple process for anyone who's installed an Operating System before.
For the purposes of this tutorial, I recommend installing FreeDOS in a virtual machine (QEMU or VirtualBox recommended) – that will simply make the networking component much easier. That said, all of this works great even on bare metal… provided you have supported networking hardware.
If you are installing in a virtual machine, set up a VM with 32 MB of RAM and a 500 MB hard drive. This should be plenty. Because… DOS.
Step 2) Install DOS Networking Software
Reboot your DOS machine (or virtual machine) and make sure the FreeDOS installer .ISO is mounted (or the USB/CD is in the drive if you are using DOS on a physical PC).
Run the FreeDOS package manager application:
FDIMPLES.EXE(On a standard FreeDOS install FDIMPLES.EXE will be in the system path, so you can be in any directory when you run it. Otherwise it is, by default, stored in C:\FDOS\BIN.)
From the “Networking” section, select the following packages:
FDNET
MTCP
WGET
Then chose “OK” to install the packages. At this point you'll want to reboot to load everything properly.
Step 3) Install a Web Server
There are, believe it or not, multiple options for running a Web Server under DOS. Seriously. Not a joke.
In this tutorial I'll show you how to install two of them. Because… why not? You can install either. Or both. Follow your heart.
First, let's install Sioux – which is the more feature-packed of the two we look at here. Run these commands one at a time.
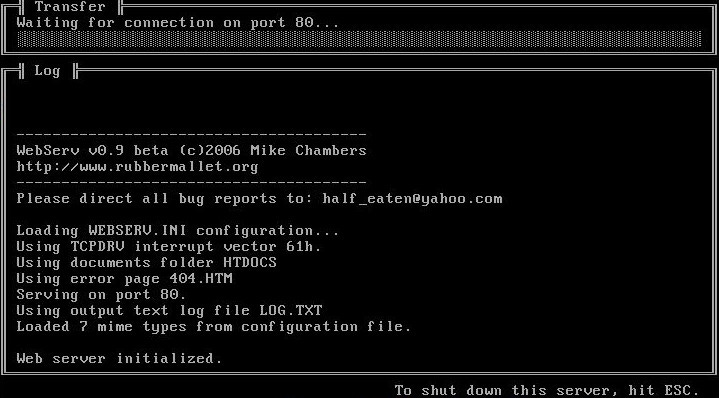
md siouxcd siouxwget http://www.georgpotthast.de/sioux/sioux.zipunzip sioux.zipNow let's install WebServ. Which, believe it or not, was written in BASIC. That's right. Follow this tutorial and you'll have run a Web Server. Programmed in BASIC. In DOS. (Kemeny & Kurtz would be proud.)
cd \md webservcd webservwget http://rubbermallet.org/software/download/websv09b.zipunzip websv09b.zipStep 4) Run the Web Server
Note: Both Sioux and WebServ require ntcpdrv.exe to be run first. Luckily, ntcpdrv.exe is included with both and super easy to use. Just be sure to replace the IP, Netmask, and Gateway parameters (in the commands below) with the actual numbers for your DOS machine (you can find them when you first boot DOS).
To run Sioux:
cd \cd siouxntcpdrv -ip=10.0.0.2 -netmask=255.255.255.0 -gateway=10.0.0.1sioux.exeTo run WebServ:
cd \cd webservntcpdrv -ip=10.0.0.2 -netmask=255.255.255.0 -gateway=10.0.0.1webserv.exeAll done!
That's it! You now have your very own DOS-based Web Server!
In order to test it out simply load up any web browser you like and point it at the IP address for your DOS installation (same IP that you see at boot time and that you used with NTCPDRV.EXE above).
Wham-o! You've done it! You've run your own DOS Web Server!
This is what the default page shipped with WebServ looks like:
Note: If you have trouble connecting to the IP address of a DOS virtual machine (such as inside VirtualBox) you may need to change your network settings for that particular VM to be bridged instead of NAT. That way the DOS VM is accessible from the host machine.
Now that you’ve run your own DOS webserver (how awesome is that?!) you’ll probably be wanting to share this magic with others. Here’s a button that helps you do exactly that.


